Getting Started With Django First App

Let's get started with our very first django application. I always recommend newbies to use the latest versions of django and python. Python2.X.X has no active support. We generally develop many projects on a single machine with different requirements(python packages). If we install python packages globally some projects may not work properly. To avoid it we should use virtual environments. Before we dive into our first django application I recommend you to read ["setting up django development environment"]/course/django/setting-up-django-development-environment/).
Let's create the our first django application
Steps to create a django application
- Create a directory named "my_first_app" and change directory into it.
- Now, install django package with pip.
- Create a virtual environementfor python3 with command "virtualenv -p python3 env3"
- Create a django project named "myproject" and change the directory path to "myproject".
- Now, run the command "python manage.py runserver 8000". After, open the browser (I prefer mozilla or google chrome) and access "
https://localhost:8000" to see the success output.
I've added reference code below(OS: Ubuntu)
$ mkdir my_first_app
$ cd my_first_app
$ virtualenv -p python3 env3
$ source ./env3/bin/activate
(env3)$ pip install django
(env3)$ django-admin startproject myproject
(env3)$ cd myproject
(env3)$ python manage.py runserver 8000
Let's understand the django project structure
After above steps our project structure looks like below
myfirst_app
└── myproject
    ├── db.sqlite3
    ├── manage.py
    └── myproject
        ├── __init__.py
        ├── __pycache__
        ├── settings.py
        ├── urls.py
        └── wsgi.py
Our project execution starts from "management.py" for development server which is a python dev server. In production we replace the python dev server with servers like "Nginx", "Apache2", etc. Whenever a request comes to the server that is sent to WSGI application which we can see it in file "myptoject/wsgi.py" Django WSGI application uses settings in "myproject/settings.py" . "settings.py" files contains settings like URL Routing point, Database, Template directories, Static directories and more which we will learn about all these settings in coming articles.
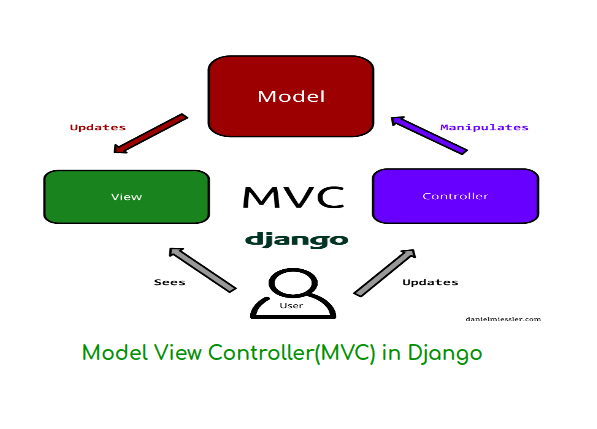
As Django is a MVC (MTV) framework it is divided into 3 parts 1.Model(Databases & ORM), 2.View(Business Logic) and 3.Template(User Presentation). Whenever a request comes in first it is passed to url router and then to view. View renders the template(HTML) and returns the response. For more details see "Django Request Response Lifecycle".
Let's write our First Django View
If we see our project settings, we can find that our url setting is configured to "myproject/urls.py" (ROOT_URLCONF = 'myproject.urls'). In "urls.py" file we create url configurations in which are used by django to route the url paths to respected views. In django, we devide complex web applicaiton into simple apps which provides us quick navigation to the project.
Let's write a simple view that returns plain text "Hello World". Before that let's create an app named "myapp". To create app run the command "python manage.py startapp myapp". After the command executed our project structure looks like below.
myproject
├── db.sqlite3
├── manage.py
├── myapp
│   ├── admin.py
│   ├── apps.py
│   ├── __init__.py
│   ├── migrations
│   │   └── __init__.py
│   ├── models.py
│   ├── tests.py
│   └── views.py
└── myproject
    ├── __init__.py
    ├── __pycache__
    ├── settings.py
    ├── urls.py
    └── wsgi.py
Let's take a small introduction of django applicaiton structure.
- admin.py: Django comes with built in admin panel. This file contains the configurations for built-in admin panel.
- apps.py: We already know django can have multiple apps and each app can have it's specific configurations. This file contains the app configurations.
__init__.py: This file used to represent the directory "myapp" as a python package.- migrations/: Whenever we make database related changes all those changes are recorded in the form of migrations and stored in this directory.
- models.py: A model is a equivalent representation of relational database table. It contains the database tables in the form of django models.
- tests.py: Django comes with unit tests. we write django unit tests in this file.
- views.py: Views are mapped to urls which will return HttpResponse. This file contains the app related views.
Let's write our very first django app view
- we will write a view that will return "Hello World" as a response.
- open file **"myapp/views.py"**and add below code to it.
from django.http import HttpResponse

def hello(request):
    data = "Hello World"
    return HttpResponse(data)
Every django view takes request as a first parameter and returns the HttpResponse. Above view will return response "hello world" * Now, we have to map the view to urls. To do it, open file "myproject/urls.py" edit it as below.
from django.contrib import admin
from django.urls import path
from myapp.views import hello

urlpatterns = [
    path('admin/', admin.site.urls),
    path('hello/', hello, name="hello")
]
We have imported our view "hello" from myapp/views.py and mapped it to url "hello/" using django "path" utility.
-
Now, access
https://localhost:8000you will get 404 page. Because we have updated ourmyproject/urls.pyThe page also says that it only contains 2 patters 1.admin/2.hello/. -
Access
http://localhost:8000/hello/to see our very first view responseHello World. It's only returned plain text. Now, it's time to return some HTML response. -
Let's change our view hello (
myapp/views.py) to below code
from django.http import HttpResponse

def hello(request):
    data = """
        <html>
          <title>Hello World</title>
          <body>
            <h1>Hello World</h1>
          </body>
        </html>
    """
    return HttpResponse(data)
If we access the page http://localhost:8000/hello/ we can see the HTML response which contains text "Hello World" inside a "h1" tag. We can add more views to our our very first django application. In the above view we have written all the HTML code inside the view. It's not a good practice. I've shown it just to make you understand how the view works. For live projects we maintain the project structure. The project structure divided into django code (views, urls, tests, forms, models and other utilities), templates(HTML files) and static files(CSS, JavaScript, Images, Videos, etc). In the next article, We will see how to use templates and static files.

